How to Shoot Panning Shots
If you’re focused on leveling up your automotive or motorsport photography skills, shooting panning shots will eventually be a requirement. This also applies to most sports photography. Know that I’ve been where you are. You’ve got your camera, it’s race day or a friend agrees to drive back and forth for you while you practice. You’re panning like your life depends on it, and maybe you get a lucky few times, but for the most part, you pull up your photos on the laptop and it’s a big fat disappointment.
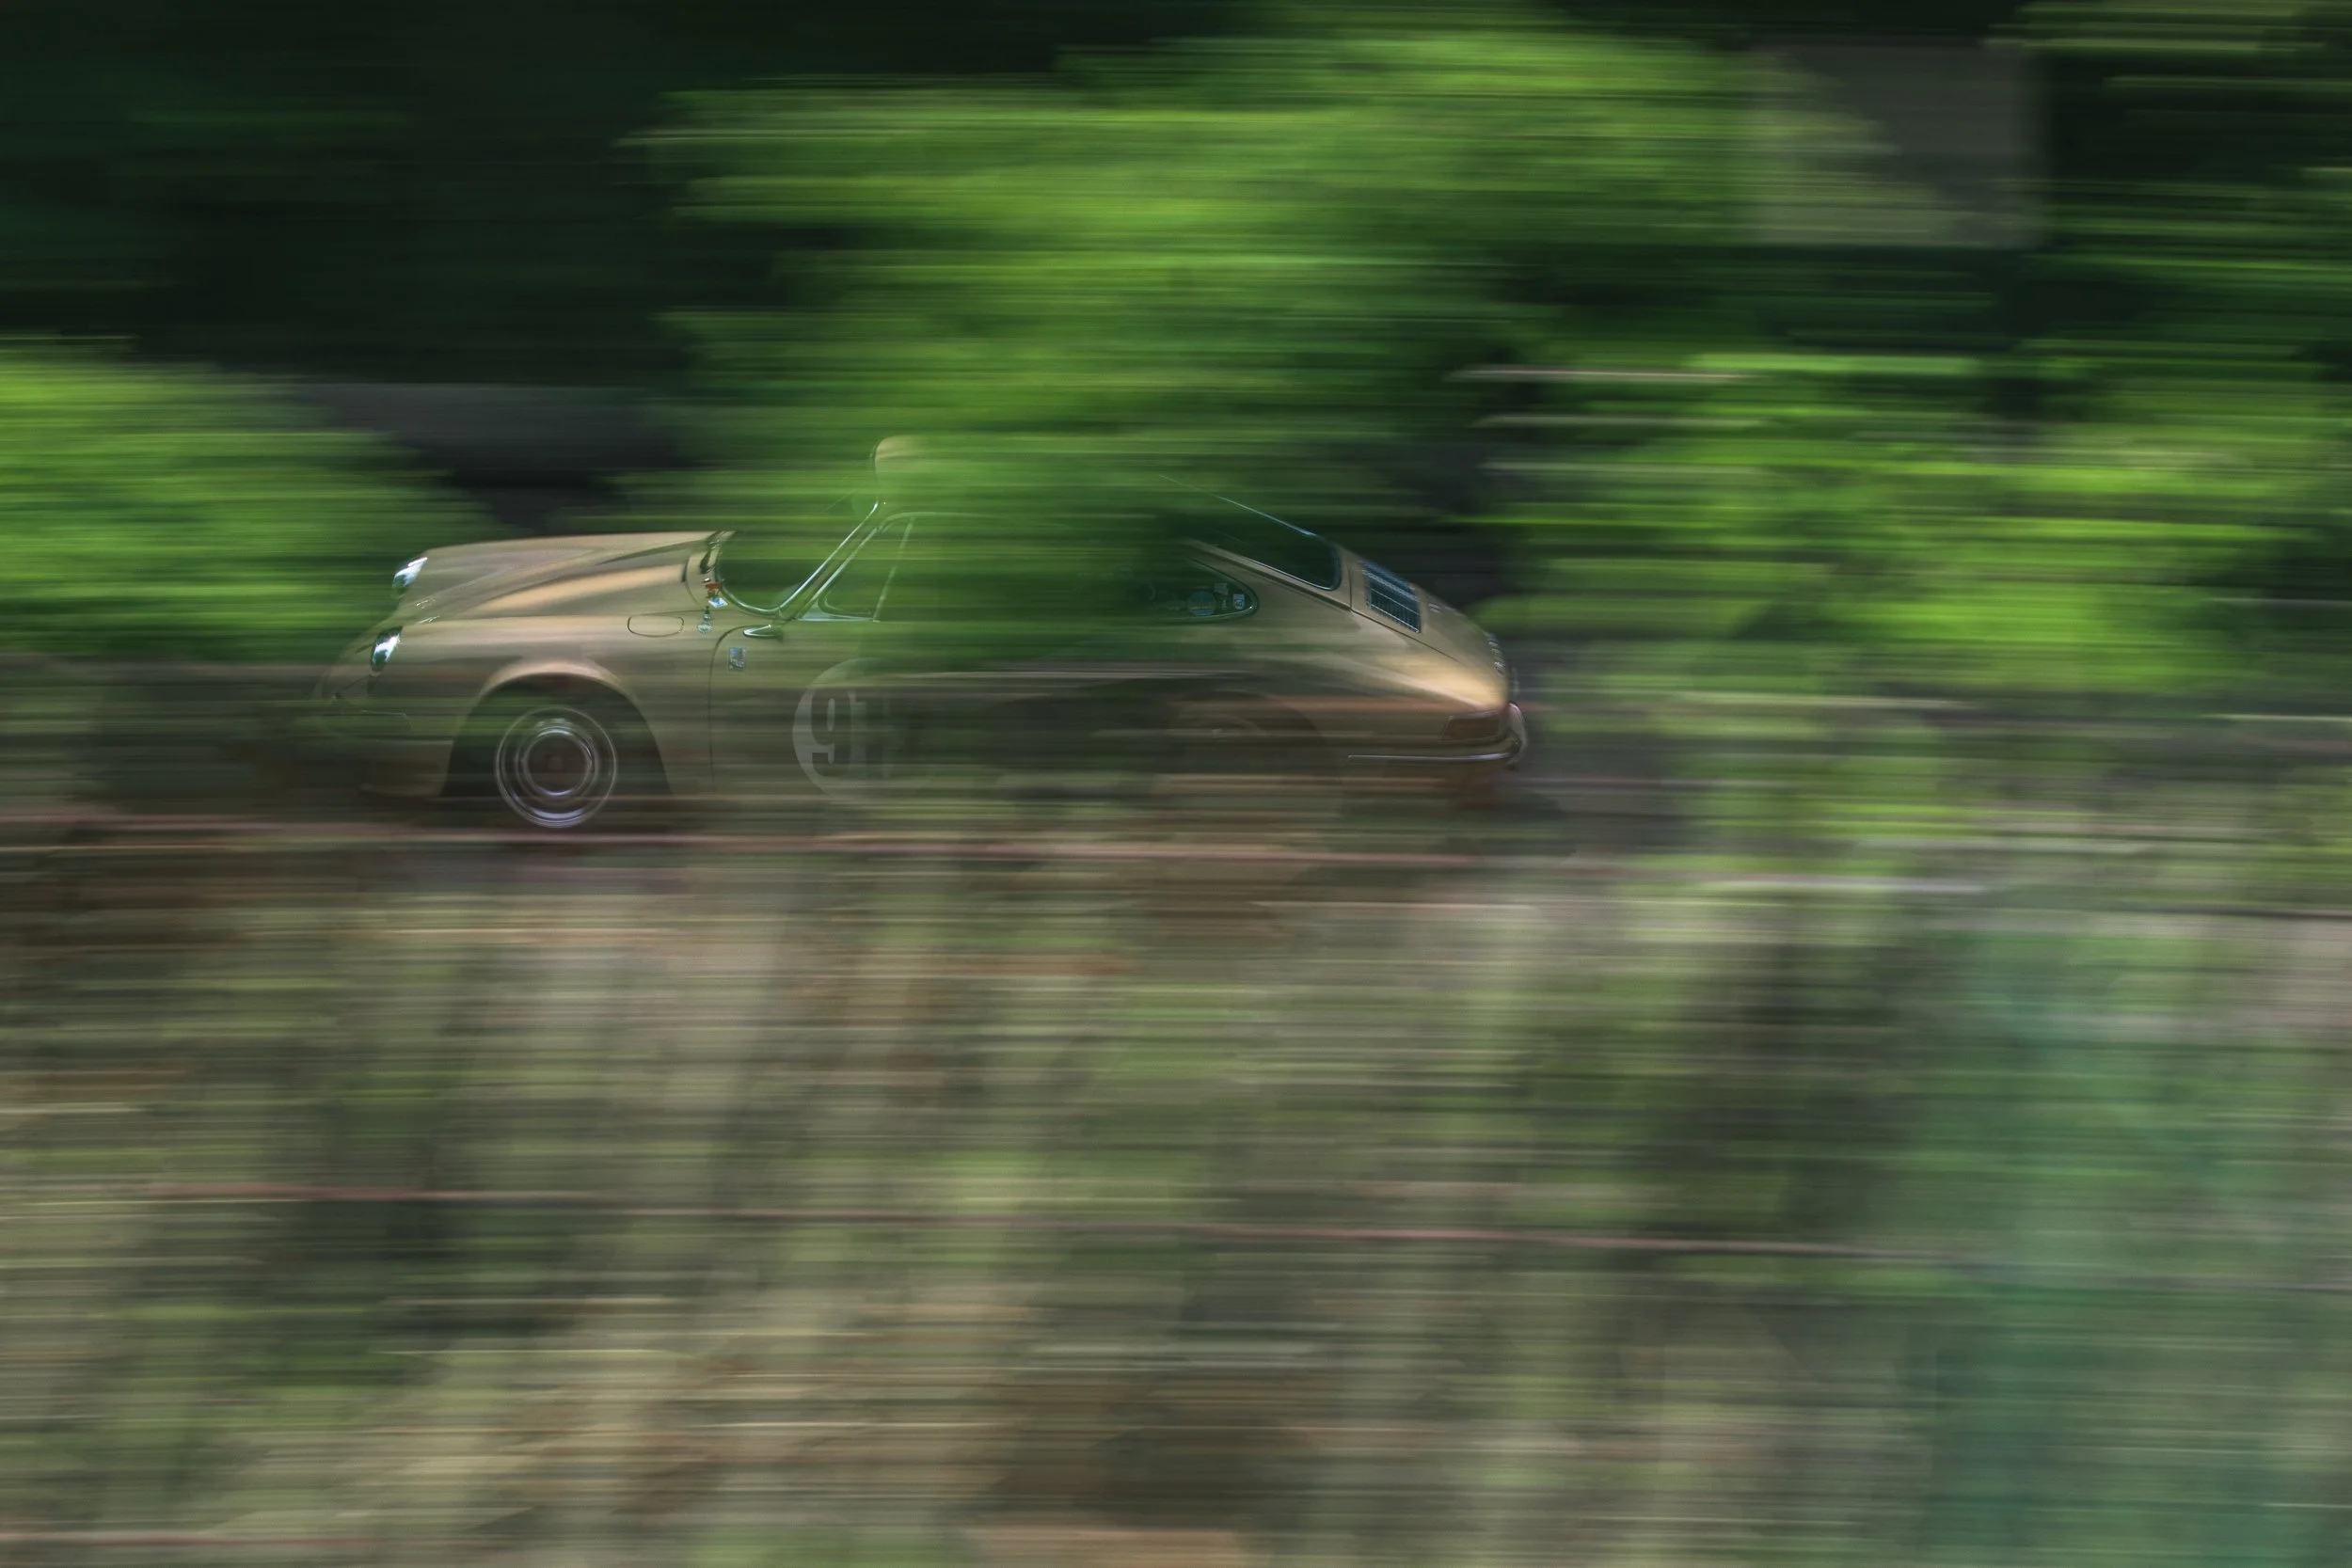
The good news is, things are going to get better, and hopefully, this blog will jumpstart your progress toward more consistent, silky-smooth backgrounds with crispy subjects in the foreground. Let’s get started.
A Quick Word on Gear
Yes, great gear can help make your life easier (we’ll dive into this later), but you don’t need an expensive setup to capture great panning shots. You do need a camera that allows you to adjust shutter speed, aperture, and ISO independently of one another. You should also have a Circular Polarizing Filter for your lens to help remove distracting reflections from the car. And of course, plenty of storage and battery life, because we’re going to be snapping away.
A walkie-talkie can be helpful for talking to the driver, but not necessary.

Camera Settings
First, set your mode to Manual, because you’re going to be controlling all the settings. Ensure you have your white balance dialed in. It’s also a good idea to shoot in RAW format, because this provides you the most control over your image during your post production process.
Set your drive mode to high speed, meaning your camera will snap photos as fast as it can while you hold the shutter button down.
These next settings are only starting points. Getting your shutter speed, aperture, and ISO right is dependent on many factors, like these:
How far away you are from the car
The amount of daylight available
How fast the car is going
The focal length of your lens
Here’s where I recommend you begin:
Shutter Speed: 1/60
Aperture: F9 (we’ll use aperture to control the light - more on this in a moment)
ISO: as low as possible (this will prevent noise and harsh highlights from showing up in our photos)
Set to Autofocus
Have the driver start somewhere between 40-60mph as he or she goes by.
Framing and Technique
It’s worth noting that a shorter, wider focal length is more forgiving of camera shake. This doesn’t mean you should shy away from a longer lens, but if you’re working with a kit lens, start somewhere between 18-35mm and make sure any stabilization features your camera or lens has are turned on. Move away from or toward the car as needed.
It helps to leave some space in your frame; show a little environment around the car so it’s not dominating the frame from end to end.
Now for the part that requires finesse and practice - the pan technique. I will say this is more important than the gear you use, and it takes a while to get it down, but keep at it and you’ll start seeing results.
Set your legs. Bend your knees slightly, place your feet roughly shoulder width apart, with your body facing toward the spot where the car will pass by directly in front of you.
Set your arms. I’ve found that tucking my elbows at my sides steadies my pan move, and forms a sort of “organic tripod.”
Rotate your upper body. Don’t move your feet or your arms, but move from the waist. As the car approaches from your right for example, turn your upper body to the right, and as the car nears, half-press your shutter and focus on the headlights. As you rotate your upper body to match the speed of the car, lock focus (this should happen in less than a half second depending on your gear), press and hold the shutter. Smoothly move your upper body as the car goes by.

Fine Tuning Your Settings
Okay, you’ve done a few test runs. What do you notice about your shots? Are they all crispy? Are you getting some background blur? Are they super blurry? Are they too overexposed or too dark? Here’s how to address what you’re seeing:
Too overexposed. “Stop up” on your aperture, meaning if you started at F9, bump it to, say, F14. Look through your viewfinder as you do this and see where your light meter is moving to. Keep stopping up until you get a correct exposure.
Too underexposed. If your photo is too dark, open up your aperture (stop down), from F9 to F4 for example. You can also slow your shutter speed.
Not much background blur. There are four possible ways to address this - I typically go with some combination of the first two:
Have the car go faster
Open up your shutter speed (lower it from 1/60 to, say, 1/40 and experiment some more). You may need to compensate for the extra light this lets in by “stopping up” on your aperture (see “too overexposed” above)
Get closer to the car
Increase your focal length (zoom in or use a longer lens)
Subject is too blurry. You can increase your shutter speed, but this is going to create less background blur, which will make your photo less dynamic. Above 1/80, you won’t see much blur in your photo in most scenarios. Practice your technique some more - you’ll get it!
Subject almost ran me over me. Backup! What are you, nuts? Seriously though, be safe, and if you’re near the road, it’s a good idea to wear a safety vest. It’s not fashionable, but staying alive means you get to shoot more cars. And if you get one with pockets, you can store things in it, like snacks and batteries.
It’s worth noting that when you adjust shutter speed, you may need to adjust your aperture to compensate for the new amount of light you’re letting in.
Places to Practice
There’s the obvious “ask your friends” which can help you get some reps in. But it’s also fun to shoot cars that are trying to go fast.
Hagerty keeps a giant list of motorsport events near you, and if you sign up for their newsletter, it’ll come to your inbox. I still practice at local Autocross events to stay sharp. And, it helps you meet drivers and build relationships with them.
Lastly, find a sidewalk or bridge in your city that provides a good vantage point and shoot cars as they’re driving by. The more you shoot, the better your technique will get.
Once you’re getting a usable image about 10% of the time, you’re on the money. Keep pushing the limits of your skills by lowering your shutter speed. I’m at about a 5% success at 1/20 these days, and I’m working to get even better.
Gear Upgrades
Okay, so I said gear doesn’t make or break you, and that’s true. But once you have a little money coming in from your efforts and you want to improve your panning even more, look for a lens that has horizontal stabilization built in. Also, there are newer mirrorless cameras out there like the Canon R6 that can not only take 20 images per second, they boast built-in automobile focus tracking.
I recently picked up the Canon 70-200mm lens, and it has made a noticeable impact on all my images, including panning.
That said, it’s worth repeating that practicing panning technique has made the biggest impact!
I hope this guide inspires you to get out there and shoot with more confidence!
If you found this helpful, I’d love it if you give me a follow on Instagram @coachlightphoto and say hello, or stop by the Print Shop have a look. Thanks for reading, and happy panning y’all.
- Mike
